# Setup Superawesome Ads (Unity 2021 and SA 8.5.3 or higher)
Basic setup for SA in an empty project.
# Android
The test was done in Unity version is 2021.3.18 but it should be working with Unity version 2020.
1. Create an empty project
2. Download and Import Unity package [SA 8.5.3](https://github.com/SuperAwesomeLTD/sa-unity-sdk/releases/tag/8.5.3) (higher versions should work the same way )[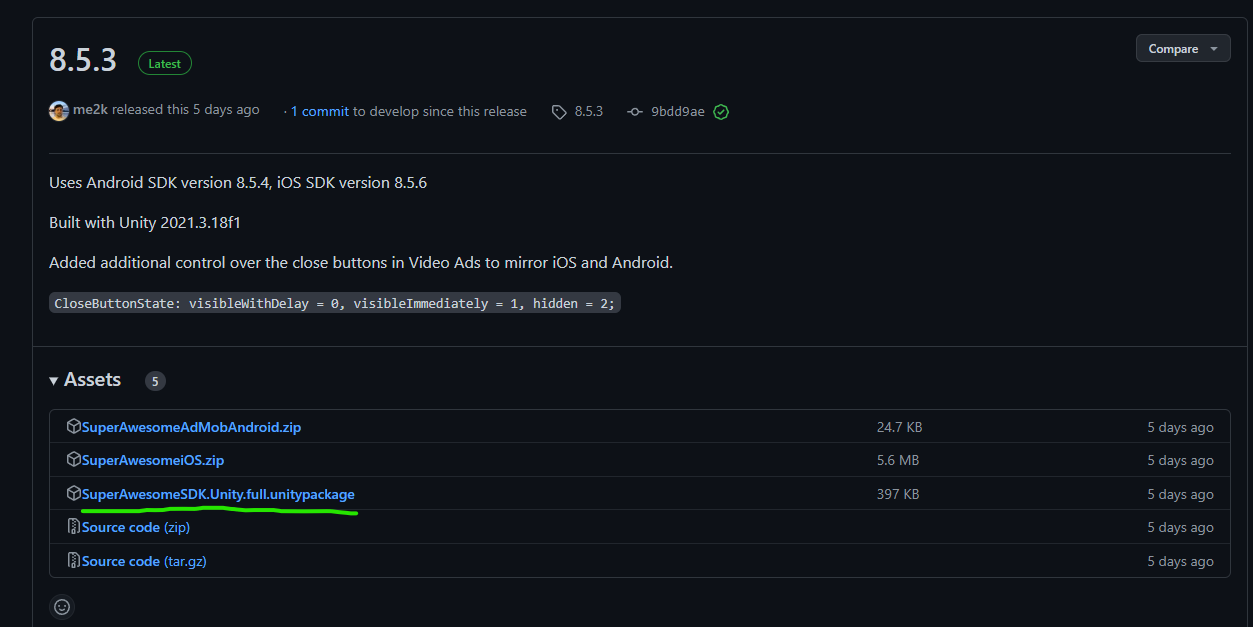](https://docs.quadom.com/uploads/images/gallery/2023-03/BUUimage.png)
3. Depending on the Unity version delete * **unity-classes.jar** * file from the ***Plugins/Android*** folder if it causes duplicated method issues. In Unity 2021.3.18 it needs to be deleted.
[](https://docs.quadom.com/uploads/images/gallery/2023-03/7Pgimage.png)
4. Create a script that will handle the initialization and launching of the SA ads that contain the following code. The script is a tweaked version of the one from the [Interstitials tutorial](https://sa-unity-sdk.superawesome.tv/docs/interstitial-ads)
**In line 6 add your Placement ID**```c#
using tv.superawesome.sdk.publisher;
using UnityEngine;
public class MainScript : MonoBehaviour
{
private const int PlacementId = 30473;
private void Awake()
{
AwesomeAds.init(true);
}
private void Start()
{
// set configuration production
SAInterstitialAd.setConfigurationProduction();
// to display test ads
SAInterstitialAd.enableTestMode();
// lock orientation to portrait or landscape
SAInterstitialAd.setOrientationPortrait();
// enable or disable the android back button
SAInterstitialAd.enableBackButton();
//set callbacks so we play an ad only after it's loaded
SetCallbacks();
}
public void PlayInterstitial()
{
// start loading ad data for a placement
SAInterstitialAd.load(PlacementId);
Debug.Log("Try to play ad...");
}
private void SetCallbacks()
{
SAInterstitialAd.setCallback(SAInterstialAd_OnCallback);
}
private void SAInterstialAd_OnCallback(int placementId, SAEvent eventType)
{
Debug.Log($"Handling Interstitial callback for id {placementId}...");
switch (eventType)
{
case SAEvent.adLoaded:
// called when an ad has finished loading
Debug.Log("Ad loaded callback...");
SAInterstitialAd.play(PlacementId);
break;
case SAEvent.adEmpty:
// called when the request was successful but the server returned no ad
Debug.LogWarning("Ad empty callback...");
break;
case SAEvent.adFailedToLoad:
// called when an ad could not be loaded
Debug.LogWarning("Ad failed to load callback...");
break;
case SAEvent.adShown:
// called when an ad is first shown
Debug.Log("Ad shown callback...");
break;
case SAEvent.adFailedToShow:
// called when an ad fails to show
Debug.LogWarning("Ad failed to show callback...");
break;
case SAEvent.adClicked:
// called when an ad is clicked
Debug.Log("Ad clicked callback...");
break;
case SAEvent.adEnded:
// called when a video ad has ended playing (but hasn't yet closed)
Debug.Log("Ad ended callback...");
break;
case SAEvent.adClosed:
// called when a fullscreen ad is closed
Debug.Log("Ad closed callback...");
break;
}
}
}
```
5. Call the ***PlayInterstitial()*** method from the above script via a button from the scene.
#### **The following sections are automated in our main projects**
6. In Build Settings activate the ***Export Project** * checkbox and click ***Export**.*[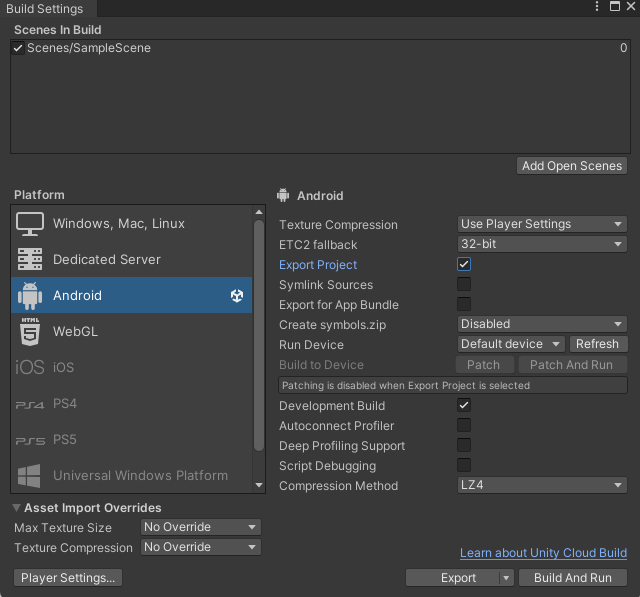](https://docs.quadom.com/uploads/images/gallery/2023-03/xMMimage.png)
7. Open the exported project in Android Studio *(if asked use Android SDK )*
8. Open the Gradle file of the project ( here the project was in the **Build** folder )
[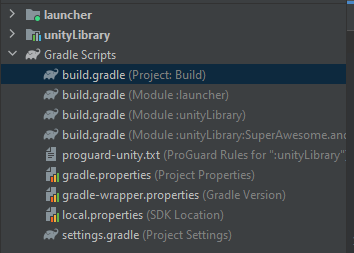](https://docs.quadom.com/uploads/images/gallery/2023-03/1heimage.png)
9. Add ***mavenCentral()*** *into the* **repositories** on ***lines 4 and 20***
10. Add **classpath "org.jetbrains.kotlin:kotlin-gradle-plugin:1.6.20"** to ***line 15*** ```c
allprojects {
buildscript {
repositories {
mavenCentral()
google()
jcenter()
}
dependencies {
// If you are changing the Android Gradle Plugin version, make sure it is compatible with the Gradle version preinstalled with Unity
// See which Gradle version is preinstalled with Unity here https://docs.unity3d.com/Manual/android-gradle-overview.html
// See official Gradle and Android Gradle Plugin compatibility table here https://developer.android.com/studio/releases/gradle-plugin#updating-gradle
// To specify a custom Gradle version in Unity, go do "Preferences > External Tools", uncheck "Gradle Installed with Unity (recommended)" and specify a path to a custom Gradle version
classpath 'com.android.tools.build:gradle:4.0.1'
classpath 'org.jetbrains.kotlin:kotlin-gradle-plugin:1.6.20'
}
}
repositories {
mavenCentral()
google()
jcenter()
flatDir {
dirs "${project(':unityLibrary').projectDir}/libs"
}
}
}
task clean(type: Delete) {
delete rootProject.buildDir
}
```
11. Open the ** build.gradle(Module :launcher) ** file
[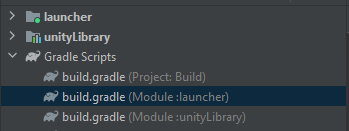](https://docs.quadom.com/uploads/images/gallery/2023-03/j0zimage.png)
12. Add the missing directive at the top of the script *( line2 )*
```
apply plugin: 'kotlin-android'
```
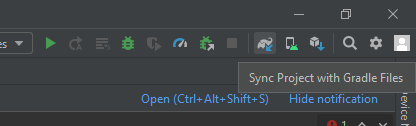
13. Click the **S*****ync Project with Gradle Files *** button and wait for Android Studio to download/import all the required packages.
[](https://docs.quadom.com/uploads/images/gallery/2023-03/558image.png)
14. Go back to Unity, click Export again then Build or Build & Run and ads should be working when clicking the button.
# iOS
1. Create empty Unity project (used version is 2021.3.18)
2. Download Unity package [SA 8.5.3](https://github.com/SuperAwesomeLTD/sa-unity-sdk/releases/tag/8.5.3) (higher versions will *probably* work)
3. Download [SuperAwesomeiOS.zip](https://github.com/SuperAwesomeLTD/sa-unity-sdk/releases/download/8.5.3/SuperAwesomeiOS.zip) (will be required later)
4. Import package in Unity
5. Copy paste *MainScript.cs* (script is a tweaked version of the one from their tutorial) [Interstitials tutorial](https://sa-unity-sdk.superawesome.tv/docs/interstitial-ads)```c#
using tv.superawesome.sdk.publisher;
using UnityEngine;
public class MainScript : MonoBehaviour
{
private const int PlacementId = 30473;
private void Awake()
{
AwesomeAds.init(true);
}
private void Start()
{
// set configuration production
SAInterstitialAd.setConfigurationProduction();
// to display test ads
SAInterstitialAd.enableTestMode();
// lock orientation to portrait or landscape
SAInterstitialAd.setOrientationPortrait();
// enable or disable the android back button
SAInterstitialAd.enableBackButton();
//set callbacks so we play an ad only after it's loaded
SetCallbacks();
}
public void PlayInterstitial()
{
// start loading ad data for a placement
SAInterstitialAd.load(PlacementId);
Debug.Log("Try to play ad...");
}
private void SetCallbacks()
{
SAInterstitialAd.setCallback(SAInterstialAd_OnCallback);
}
private void SAInterstialAd_OnCallback(int placementId, SAEvent eventType)
{
Debug.Log($"Handling Interstitial callback for id {placementId}...");
switch (eventType)
{
case SAEvent.adLoaded:
// called when an ad has finished loading
Debug.Log("Ad loaded callback...");
SAInterstitialAd.play(PlacementId);
break;
case SAEvent.adEmpty:
// called when the request was successful but the server returned no ad
Debug.LogWarning("Ad empty callback...");
break;
case SAEvent.adFailedToLoad:
// called when an ad could not be loaded
Debug.LogWarning("Ad failed to load callback...");
break;
case SAEvent.adShown:
// called when an ad is first shown
Debug.Log("Ad shown callback...");
break;
case SAEvent.adFailedToShow:
// called when an ad fails to show
Debug.LogWarning("Ad failed to show callback...");
break;
case SAEvent.adClicked:
// called when an ad is clicked
Debug.Log("Ad clicked callback...");
break;
case SAEvent.adEnded:
// called when a video ad has ended playing (but hasn't yet closed)
Debug.Log("Ad ended callback...");
break;
case SAEvent.adClosed:
// called when a fullscreen ad is closed
Debug.Log("Ad closed callback...");
break;
}
}
}
```
6. Create some sort of UI that should call *PlayInterstitial()* method from above script
7. Open xcode and drag and drop the 4 files from [SuperAwesomeiOS.zip](https://github.com/SuperAwesomeLTD/sa-unity-sdk/releases/download/8.5.3/SuperAwesomeiOS.zip) into the Framework and iPhone tabs (check *copy files if needed* checkbox*)*
8. The files from [SuperAwesomeiOS.zip](https://github.com/SuperAwesomeLTD/sa-unity-sdk/releases/download/8.5.3/SuperAwesomeiOS.zip) should *not* be embeded into the Framework but should be embeded into the iPhone project
9. Disable bitcode from xcode settings(project's root/setting file and find your way to the “Build Settings” tab. Use the search bar to find “Bitcode” and change the setting to disabled)
10. Make sure you are using correct bundle id and team settings
11. Build & run on a device/simulator
**Note:** [SuperAwesomeiOS.zip](https://github.com/SuperAwesomeLTD/sa-unity-sdk/releases/download/8.5.3/SuperAwesomeiOS.zip) will eventually be included in the Unity package so step 3 will not be required and steps 7-9 will be done automatically but are not done at the time of writing this guide.